LED Strip Lights Ideas
LED strip lights have a reputation for looking cheap and gimmicky in the wrong hands — the neon-purple underlighting on a teenager’s desk, the RGB rainbow cycling endlessly for no particular reason. Done well, they’re one of the most versatile and impactful lighting tools available for homes. This guide is about doing them well: the right strips for the right applications, installed in ways that look intentional rather than afterthought.
Strip lights succeed when they serve a clear purpose: eliminating shadows for task work, adding visual depth to a space, or providing ambient light that no fixed fixture can reach. They fail when used purely as decoration without a functional or atmospheric reason. That distinction is what separates magazine-worthy cove lighting from the kind of setup that gets photographed ironically.
Types of LED Strip Lights: What to Know Before Buying
Not all strip lights are the same, and the differences matter more than price points.
| Strip Type | Best For | Key Consideration |
|---|---|---|
| Single Color (White) | Under-cabinet, cove lighting, task areas | Choose color temp at purchase — it’s fixed |
| Tunable White (CCT) | Living rooms, bedrooms, kitchens | Adjusts warm to cool via controller or app |
| RGB | Entertainment areas, accent lighting | Full colors but white is often weak/tinted |
| RGBW | Anywhere needing both color AND good white | Best of both worlds; slightly more expensive |
| High-Density (High CRI) | Display lighting, artwork, retail | CRI 90+ for accurate color rendering |
| IP65/IP67 Waterproof | Bathrooms, outdoor, under showers | Required wherever moisture is present |
One spec that rarely gets enough attention: LED density (LEDs per meter). Low-density strips (30 LEDs/m) create visible hotspots and dots rather than a smooth line of light. For anything where the strip might be partially visible — shelving lip edges, cove channels where the reflected glow is the point — aim for 60 LEDs/m minimum and 120 LEDs/m for the best diffusion. Pair with a diffuser channel (aluminum extrusion with a frosted cover) and the result looks professional.
“Strip lights work best when they disappear — when you see the effect, not the source.”
Kitchen Applications
Under-Cabinet Task Lighting
The most practical strip light application in any home. Strips mounted to the underside of upper cabinets eliminate counter shadows entirely — the main complaint with overhead-only kitchen lighting. Use single-color or tunable white strips at 3000K–4000K for cooking tasks. Mount toward the front of the cabinet underside for maximum counter coverage. An aluminum channel with frosted diffuser makes the installation look built-in rather than retrofitted.
Inside Cabinet Lighting
LED strips inside glass-front cabinets or open shelving create display lighting that makes dishes, glassware, and pantry items look intentional. This is the kitchen equivalent of retail display lighting. Warm white (2700K–3000K) at low brightness is the standard approach — enough to see clearly without creating glare off glass surfaces. Motion-activated options exist for cabinets that open and close frequently.
Toe Kick and Base Cabinet Lighting
A strip of warm amber LED behind the toe-kick (the recessed base of lower cabinets) creates a floating effect and provides enough ambient light to navigate the kitchen at night without turning on full overhead lights. This is increasingly common in kitchen renovations for its practical night-use value and its dramatic visual effect in dark hours.
Living Room and Entertainment Space Ideas
TV Backlight (Bias Lighting)
Mounting an LED strip behind a television — on the wall-facing side of the TV frame — reduces eye strain during viewing by raising the ambient light level around the screen. The contrast ratio between a bright screen and a completely dark wall causes the eye to constantly readjust, producing fatigue over time. Bias lighting reduces this contrast without washing out the screen.
Use a color temperature matching your TV’s white balance (around 6500K for most TVs) or use RGBW strips with smart syncing to match on-screen colors. Keep brightness low — this should be ambient, not illumination.
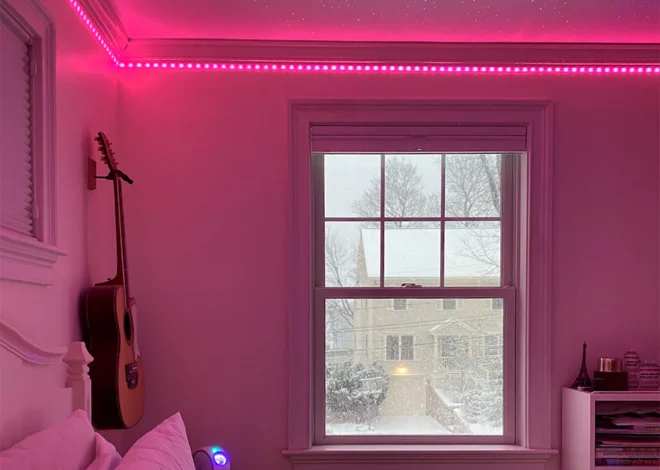
Cove and Indirect Ceiling Lighting
Cove lighting — strips mounted in a recessed channel around the perimeter of a ceiling, angled to wash light upward — transforms a room’s atmosphere without requiring any structural work. The ceiling becomes a diffuse light source, creating soft shadows and depth that overhead fixtures can’t reproduce. Warm white at 2700K–3000K is typical for living rooms. Tunable white strips let you shift from warm amber evenings to neutral white for activities. Choosing the right color temperature for this type of ambient application makes a significant difference.
Bookshelf and Display Lighting
Strips running along the back of bookshelf units create visual depth and make displayed items pop against the illuminated background. Warm white for books and objects. For plants, consider a purpose-built grow-light strip or full-spectrum 5000K+ to support photosynthesis. Shelf lighting dramatically increases the apparent brightness of a room at low wattage — a fully lit bookshelf wall contributes both function and atmosphere.
Bedroom Strip Light Ideas
Bedrooms are where strip lights are most likely to either enhance a space or cheapen it — the difference usually comes down to color temperature and brightness control.
- Under-bed night light: Low-wattage warm amber strips under the bed frame facing the floor create soft navigation lighting for nighttime without waking a sleeping partner. Motion-activated controllers make this fully automatic.
- Behind headboard glow: Strips on the wall side of a headboard create soft halo lighting. Use smart tunable white strips to warm and dim automatically as bedtime approaches — genuinely effective sleep-hygiene automation.
- Wardrobe interior lighting: Motion-activated strips inside wardrobes activate when doors open and switch off automatically. Practical and considerably easier than installing a dedicated fixture inside a wardrobe.
- Ceiling cove: Same principle as the living room but specifically calibrated for sleep — warm white 2700K, dimmable to near-zero. More flattering and calming than any overhead fixture.
Staircase and Hallway Lighting
Staircase strip lighting has gone from a hotel-lobby feature to a practical and achievable home installation. The approach: a strip running horizontally under each tread overhang, facing downward, illuminating the riser below. The result provides navigation lighting at very low power and eliminates the need for bright overhead staircase fixtures at night.
Motion-sensing controllers are the standard choice for staircases — lights activate as someone approaches the bottom or top of the stairs, then fade out after 30–60 seconds. The fade rather than immediate shutoff (achievable with any PWM dimming controller) is what separates polished from functional.
Hallways benefit from strip lighting similarly — strips in a ceiling channel or along the base of walls create enough light to navigate safely without requiring full overhead illumination at night. The energy use is negligible, which fits well with the broader pattern of LED’s low running costs making always-on applications genuinely practical.
Outdoor LED Strip Light Uses
Outdoor applications require IP65 minimum (splash-resistant) and IP67 for any area that might be directly rained on or splashed. Temperature range also matters — quality outdoor strips are rated for operation from -20°C to +55°C, handling both winter and summer extremes without performance issues.
Deck and step lighting mirrors the indoor staircase approach — strips under deck railings or step nosings provide safe navigation lighting after dark. Architectural accent lighting along rooflines, column bases, or garden walls creates dramatic effects with minimal power draw. Outdoor kitchen and entertainment area task lighting follows the same under-cabinet logic as indoor kitchen strips but requires waterproof ratings throughout.
Installation: Getting It Right the First Time
- Plan the channel before buying. Measure the exact run length and decide whether you need an aluminum channel with diffuser. For any application where the strip might be partially visible, diffuser channels are worth the extra effort.
- Choose 24V over 12V for runs over 3 meters. 24V systems experience less voltage drop over distance, keeping brightness consistent across the full length of a run. For short applications under kitchen cabinets, 12V is fine.
- Clean surfaces before mounting. The adhesive backing on LED strips fails on dusty or oily surfaces. Wipe the mounting surface with isopropyl alcohol and allow it to dry fully. For permanent installations, reinforce with aluminum channel clips or additional adhesive.
- Conceal the power supply. The transformer/driver is the least attractive component. Plan its location inside a cabinet or wall void. Low-quality drivers audibly hum — buy from reputable brands rather than the cheapest available.
- Test before final mounting. Run the full installation temporarily with temporary fixings before committing. Color temperature and brightness at the actual mounting position sometimes look different than expected.
Strip lights represent one of the more accessible ways to improve home lighting because the core installation requires no electrical expertise — they run on low-voltage DC and plug into standard adapters. For anyone building on the basics, reading how strip lighting fits into a whole-home lighting plan is a useful next step.
Continue Reading
- LED Color Temperature Guide — choosing between warm white, neutral, and daylight for strip lighting applications
- LED Lighting for Your Home: Room-by-Room Guide — how strip lights fit into a complete home lighting strategy
- How Much Do LED Lights Really Save? — why low-wattage strip lighting makes always-on applications practical
- LED vs. Incandescent vs. CFL — why LED technology enables these kinds of applications in the first place
Related Posts
LED vs. Incandescent vs. CFL
LED Home Lighting Room-by-Room Guide